Search

Tampilkan postingan dengan label dessert. Tampilkan semua postingan

Kamis, 07 November 2013

Martha's Easy Light Cheesecake


heavy holidays are on the way...

you might want to lighten things up a bit.


start with this absolutely delicious light cheesecake.
so easy to prepare.
ALL DONE IN THE FOOD PROCESSOR
and baked with NO WATER BATH
no one will suspect the ingredients.  friends and family had no idea the main ingredient was cottage cheese.  don't say anything...

LET THE TASTE AND TEXTURE WIN THEM OVER.


the original recipe is for a 9" cake, but i made mine in an 8" then made 2  individuals in small mason jars with cookie crumbs at the bottom.
THESE WERE BAKED FOR 30 MINUTES.


CHOCOLATE COOKIE CRUST

28 Nabisco Chocolate Wafers
2 Tbsp granulated sugar
4 Tbsp melted butter

put wafers in possessor and pulse until crumb texture.  add sugar and butter and process again.  pour crumb mixture into springform pan and tamp down with something flat.  gently press mixture up the sides.  it's a bit crumbly, but as you can see...it's do-able.
this Martha original recipe does not require going up the sides, but i found it to look more attractive.  (you shall see an example in my Lightened Up Pumpkin Pie recipe soon)

MOST OF THE CALORIES ARE IN THE CRUST SO YOU BE THE JUDGE...

bake at 325 for 12-15 minutes.  remove to cool.

NOTE...i did not use all the crust mixture and as you can see i had a nice thick crust all the way up the sides of an 8 inch pan.  better to have too much than not enough.

simply wipe out processor and begin to prepare mixture  for cake.


MARTHA'S  LIGHT CHEESECAKE 

3 cups low fat cottage cheese
8 oz. reduced fat cream cheese, room temp.
3/4 cup  granulated sugar
1/2 cup reduced fat sour cream
4 large eggs
2 Tbsp all purpose flour
2 tsp vanilla extract (Martha called for 1 tsp)
1/2 tsp salt

preheat oven to 325 degrees.
have prepared crust as noted above, or crust from original found in link.
as noted i used an 8" springform pan and had leftover.

blend cottage cheese and cream cheese until very very smooth and glossy, scraping down sides as necessary, about 4-5 minutes.  add 3/4 cup sugar, sour cream, eggs, flour, vanilla, salt and blend until filling is completely smooth.
pour filling into prepared crust.  bake until barely set in the middle, ABOUT 1 HOUR.  there should be some "jiggle".  TURN OFF THE OVEN and let the cake cool in the oven for 1 more hour.  i left the oven door slightly open...very slightly!  transfer to wire rack and let cool to room temp for 2 hours, then refrigerate until firm, at least 3 hours and up to 2 days.

Sabtu, 19 Oktober 2013

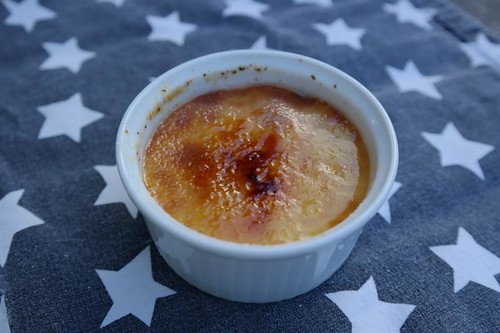
Chocolat Coconut Brûlée

coconut-choc-cremebrulee

 I rarely make desserts nowadays, or at least, so it seems. (I eat plenty of sweets, just not anything fancy. Or well, prepared.) So, as we haphazardly invited friends for dinner, I decided it was well about time to make something proper. And I had a lot of rhubarb to harvest. I decided on a variation on crème brûlée, with a rhubarb compote at the bottom. And coconut milk in lieu of regular milk, for a tropical touch. The recipe I used, from the cookbook "Strawberries and rhubarb" (a Danish book, by Sandra Leigh Dreznin) stated that it was enough for four servings. Instead, I got twelve. For the last four, I didn't have enough rhubarb since I was a bit too generous in the beginning, so I added a small handful of chocolate chips to each ramekin before pouring on the coconut-cream mixture. THAT turned out to be genious. The rhubarb ones turned out too watery and soggy, but the chocolate ones were delicious.

Chocolate Coconut Brûlée
12 small ramekins
12 tbsp chocolate chips
250 ml cream
400 ml coconut milk (1 can)
1 vanilla bean
6 egg yolks
8 tbsp sugar

Extra sugar, for brûlée-ing.

Combine cream and coconut milk in a saucepan, scrape out the vanilla bean and the seeds and the whole bean, and heat until boiling.

Beat the egg yolks and sugar until pale and fluffy. Add a spoonful of the warm cream mixture and whisk well, to temper the yolks. Then pour the yolks into the sauce pan and whisk well to combine. Heat on medium heat for a few minutes, but don't let it boil. It should thicken slightly.

Divide the chocolate between the ramekins, and then top with the cream-egg mixture. Place the ramekins in a large roasting dish. Pour warm water in the dish, to about half the height of the ramekins. Bake at 150°C for about 40-50 minutes. They should be just set. Cool, and let sit in the fridge for at least one hour but preferrably more.

Just before serving, sprinkle with sugar and use a small torch to caramelize the surface.

Selasa, 24 September 2013

Quick Vanilla Buttercream Frosting with White Vanilla Bean Cake


actually this is a ....

double layer...
WHITE VANILLA BEAN CAKE
DARK CHOCOLATE GANACHE filling
with CANDIED MACADAMIA
and...QUICK WHITE VANILLA BUTTERCREAM FROSTING

whew...that was too much for the heading.


a lovely cake for any occasion. small crumb, similar to a pound cake, but not too heavy.  holds up well and has a nice vanilla bean flavor.  the frosting is key...THIS BUTTERCREAM RECIPE IS FABULOUS.  the first one i ever made and it came together perfectly.   REALLY...this is delicious and EASY.
the dark chocolate ganache counterbalanced the plain whiteness of the over all flavor and appearance.  it slices well and it's fairly easy to put together.  i will add that the chocolate shavings were supposed to be lovely chocolate curls...this is not an easy task.  i think i tried 3 or 4 times before i finally just went with the pile of shavings...i think i'll need a little more practice on the curls. 


WHITE VANILLA BEAN CAKE

100g butter
1 cup sugar
2 eggs
1 1/2 cups flour
1 tsp baking powder
1/8 tsp baking soda
3/4 cup buttermilk
2 tsp vanilla paste

preheat oven to 360F.  butter a 9 inch cake pan and dust evenly with flour.
in a separate bowl mix the flour baking powder, baking soda, set aside.

in a big bowl place butter and sugar and beat until fluffy.  beat in eggs, one at a time, beating well after each egg.  when the buttery mixture is creamy, add 1/2 of the flour mixture and mix.  then add the buttermilk, mix again.  finally add the other 1/2 flour mixture and beat until creamy.  beat in vanilla until Incorporated.   this sounds like A LOT of mixing, but try not to over mix.

pour mixture into prepared pan.  bake for approx. 35-40 minutes.  mine took 30 minutes because i used a Fat Daddio's light cake pan.  check with skewer inserted in the middle of cake...should come out "just" clean.  remove from oven, let cool for about 10-15 minutes and remove from pan.  cool completely before frosting.


NOTE...if dividing into 2 layers you might want to refrigerate for just a bit before slicing in half.
ALSO...if you do not have a cake stand...IMPROVISE.  it is much easier to slice a cake in half when it is elevated off the board.  i used an upside down tupperware.  the taped napkin helps the cake stay in place and less likely to slip off.   use a long thin blade and score the outside, then slowly move your knife in towards the middle and around, watching that you are hitting your marks where you scored the cake.
PS...i also frost the cake on this lovely improvised cake stand.


QUICK VANILLA BUTTERCREAM FROSTING
found at foodnetwork.com by Gale Gand

3 cups powdered sugar...sifted, 306 grams total
1 cup butter, cubed, softened
1 tsp vanilla extract
1 to 2 Tbsp whipping cream

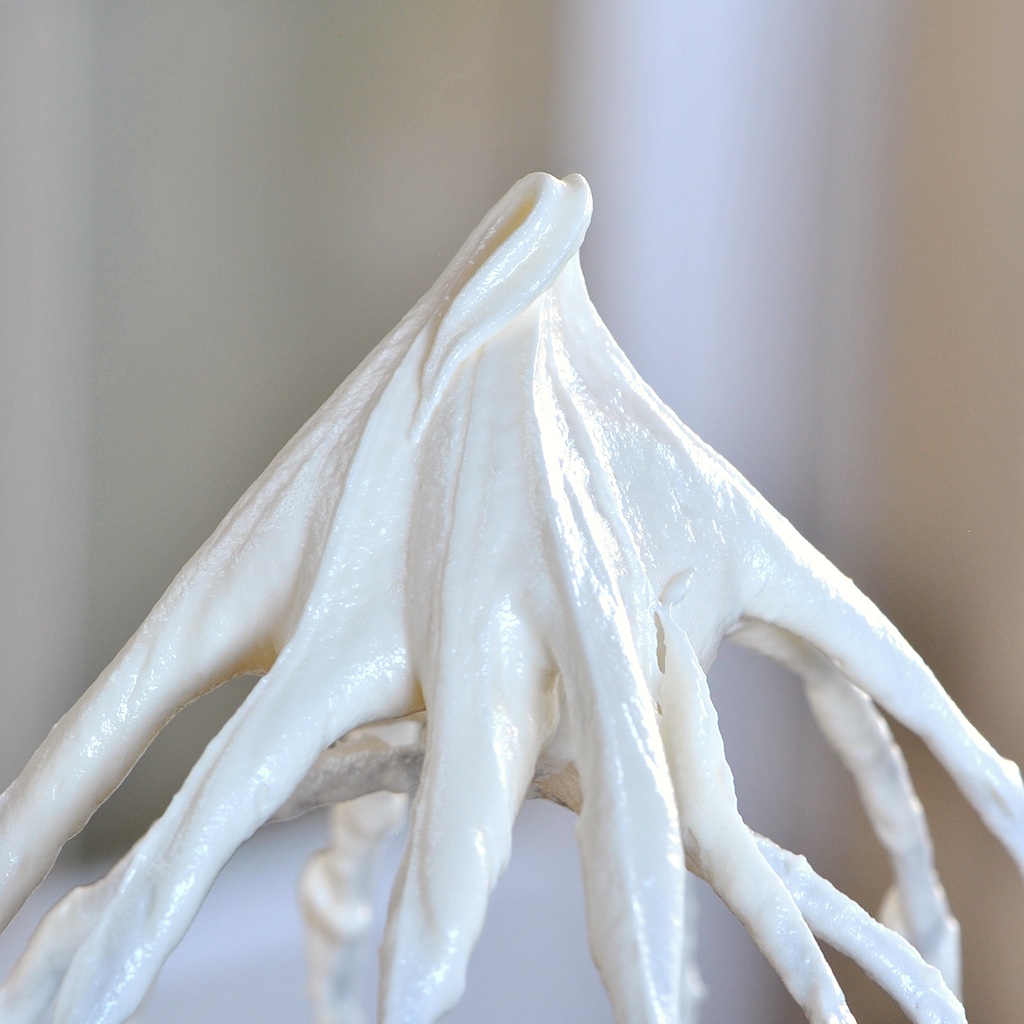
in a stand mixer fitted with whisk, mix together sugar and butter.  mix on low speed until well blended, then increase speed to medium and beat for another 3 minutes
add vanilla and cream and continue to beat on medium for 1 minute more, adding a little more cream if necessary for a spreading consistency.  i think i added about 1 Tbsp total.


DARK CHOCOLATE GANACHE FILLING
with candied macadamia
NOTE...  there IS enough frosting to fill the center as well as cover the cake, but i didn't want a plain white on white cake.  this was something i added in at the time of building the cake.  i had some left-over ganache from plain truffles.  i crushed some candied macadamia nuts and added it to the left over ganache to make the filling.

this is approx. what i had.  you will probably not use all of it...get a spoon and finish it off, make a few truffles or use it for "drizzle sauce"
6 oz dark chocolate
6 oz heavy whipping cream

prepare your ganache...put chopped chocolate in a heat proof bowl and set aside.  heat cream to a boil.  remove from heat and pour over chopped chocolate.  let sit for a minute.  begin stirring gently from the center.  you will see the ganache come together.  when it is fully incorporated, refrigerate until good spreadable consistency.  add nuts or whatever.  hmmm, maybe crunchy toffee chips?  you could use just ganache.

Jumat, 06 September 2013

Cronuts! Part 2: The Sights and Sounds

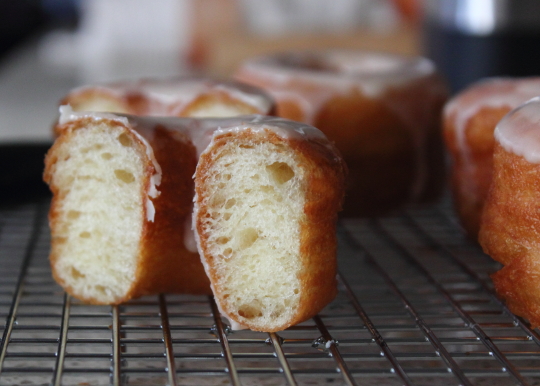
As promised, here’s the finale to our two-part cronut extravaganza! The series concludes with me frying the two batches – the first half fried as prepared in the last video, but the second half of the dough received an additional tri-fold, which resulted in a much higher, but less crispy cronuts.

Both were very good, and the second batch was more impressive looking, but I’m thinking that for a true croissant/doughnut hybrid, thinner and with less layers may be the way to go. 

Of course, if you’re going to fill yours with vanilla custard, as is the custom in NYC, then the taller, airier cronut is probably a better delivery system. Rest assured, further exploration is inevitable.

In case you’re wondering, the second half of the dough was frozen overnight, and then thawed in the fridge until soft enough to work with, so it seems as though making and freezing this would not be problem. I hope you give this a try soon. Enjoy!

Note: These cronuts were fried in grapeseed oil, at 350 degrees F. for about 1 1/2 to 2 minutes per side. Click here to watch Part 1.

Kamis, 05 September 2013

Cronuts! The Doughnuts That Make People Go Nuts! Part 1: The Dough

I’m assuming that since you’re on a food blog you've probably heard about “cronuts,” but just in case, here’s a quick review. 

This croissant/doughnut hybrid was invented by Dominique Ansel at the Dominique Ansel Bakery in New York City. It became an overnight sensation, and now people stand in line for hours just for a chance at getting one of the precious few that are made each day.

Why all the hype? Very simple – it has the shape and flavor of a doughnut, yet features the crispy, flaky texture of a buttery croissant. What’s not to hype? Anyway, after seeing like two dozen new reports on the craze, and receiving a scary number of food wishes for it, I decided to give it a go, if for no other reason than to save a few of my NYC friends the humiliation of being Instagrammed standing in that line.

Since I’ve never tasted a cronut, what follows is purely an educated guess, but I think I got pretty close. Maybe one of you New Yorkers will mail me one, so I know for sure? My game plan was simple. Make a slightly sweet, yeasty, doughnut-esque dough, which I’d then layer with butter, using the classic croissant technique.

It’s a procedure I do all the time, as in once, back in culinary school, thirty years ago. So, instead of going by the book, or even looking in a book, I winged it, and not only that, I streamlined things too. Instead painstakingly pounding out perfectly sized slabs of cold butter, I decided to try simply spreading softened butter instead. I also threw caution to the wind, and pulled off the rare and terrifying “double fold and turn,” and lived to tell the tale.

Like I said in the video, we’ll cover the final results in Part 2, but spoiler alert…these were awesome. I did two different versions, one regular, and one with an extra “fold and turn” which resulted in a taller, and even more impressive cronut. Stay tuned!


Ingredients for 16 Cronuts:
1 package dry active yeast (2 1/4 tsp)
1/2 cup warm water (105 degrees F.)
1 teaspoon fine salt
2 rounded tablespoons white sugar (add an extra if you want a sweeter 'nut)
1/2 cup milk
2 tablespoons melted butter
1 teaspoon of vanilla extract
1 large egg
1/8 teaspoon ground nutmeg
1 pound all-purpose flour, more as needed
6 ounces soft, unsalted, "European-style" butter (12 tablespoons)

Fist steps:
- Combine yeast and warm water, and let sit five minutes.
- Add the rest of the ingredients, except for the flour and the European-style butter, and whisk to combine.
- Add the flour, and knead for about three minutes or until a soft sticky dough ball forms.
- Wrap dough in plastic, and refrigerate for 20 minutes.
- Roll dough out into roughly a 18 x 9-inch rectangle.
- Proceed with butter as shown!

Kamis, 29 Agustus 2013

Country Mice


Right before we drove away from San Francisco, Fred's aunt, Jenny-King, told us about all of the wild blackberries, ripe and ready to harvest, growing all around the family cabin in Inverness. And though I am a total weirdo about almost everything fruit-related, I do love a blackberry. Perhaps it's their tartness. Jenny-King then went on to tell us about her recipe for a blackberry crumble that she and her girls loved to make each year when the berries are in season and growing rampant around the Inverness house.

She even made us a little kit with all of the crumble elements mixed together in a Ziplock bag. Just add blackberries. And butter. A stick of it.

And we were off. Driving north, headed toward Tomales Bay.


This was the part I was waiting for, the part I was really the most excited about. The little house tucked away in Inverness, Tomales Bay, Point Reyes, all very magical to me. I remember when Fred took me up there the first time, a few months into dating each other. He made a point to tell me that though it was a very special place for him, it wasn't for everyone. It was rustic, he told me. There was no television, no internet, probably no phone service. There were spiders. But it was a house that was a part of him, his family - the paternal side, and so also a little bit of his father who passed away some time ago. It was filled with good memories; memories of fishing and grilling oysters and board games – and blackberries.

Though those reasons alone would have made me fall in love with the house and with Inverness, it would have most certainly happened without them. I'll tell you right now that I am no camper. At least, I don't think I am – it's been at least fifteen years since I've camped (back in my late teens/early twenties, Paz, Spencer, Sam and I went camping on the beaches of North Carolina every Summer). The Inverness house is in no way camping, but rustic, yes.

Perfectly, beautifully, serenely, romantically rustic. And very clearly filled with happy memories of family, children growing up, dogs, friends, love, and fun. My favorite room is the kitchen. Its windows look over the Tomales Bay and it's very bright. It is filled with odds and ends that family members and guests have left over the years, a mishmosh of different sized wine glasses, cast-iron, old sippy cups for small children, wonky knives and my personal favorite, a boom box that plays cassette tapes. There is a Motown tape that I listen to over and over and over again each time I visit. And it never gets old.

During the days we wander around and collect cheese from the Cowgirl Creamery, Brickmaiden Bread, salume, duck eggs and bacon from the local Marin Sun Farms butcher shop, and clams, mussels and oysters, oysters, oysters from the Tomales Bay Oyster Company and Hog Island Oysters (because one just can never have enough). Then we drive out to Point Reyes, walk out to the tip of the world to the lighthouse and stand and look out over an almost 360 view of water before hiking back up over three hundred steps to begin the strikingly scenic drive back to town. Back in the cabin, we pour some local wine, make a cheese board, grill oysters on the deck, and retire inside by the huge fireplace listening to that Motown tape until we fall asleep in each other's arms, a little drunk, a little full, and extraordinarily content, blissful, with Smokey Robinson crooning (a little roughly as a result of that over-played tape) in our ears.


And then we wake up with the sun coming up over the bay. And we do it all over again, save for maybe picking one of the precious (and delicious) local restaurants for our one meal out.

I mean, come on.

This last trip up, we took my dad and his girlfriend, Dale, with us. We were a little nervous that they wouldn't think it was as magical as we do. But one step, maybe two, in the house and they were sold. And so we shared with them our Inverness experience. To the T. Including the magnificent blackberry harvest.


After the lighthouse afternoon and our lunch of oysters on the bay, both Dad and Dale were spent. Nap time. So Fred and I went on a hike to forage for those wild blackberries. In hindsight, I A) packed horribly (as I always do) and B) wore the absolute, complete wrong outfit for the mission. Why did no one tell me about all the thorny parts?! So my cute, rolled up pants, sandals, and cable knit sweater that gets pulls in it super easily were, perhaps, not the best plan. Cest la vie. We still got ourselves a bounty. Fred practically had to drag me away, saying something about saving some blackberries for other people in the neighborhood, or some such thing. I couldn't stop myself. Perhaps because, at that point, after all of the thorn pricks on my hands, arms and ankles, and clearly destroyed sweater, I was in it to win it - I had given in to The Experience.


When we returned to the house the old folks were just coming out of their nap haze. So I opened a bottle of rosé, made up a cheese board and put on the Motown tape (which Dad quickly changed to a classical music radio station). We then made a simple presentation of fresh, steamed clams (pulled from the Tomales Bay that day) with drawn butter and a crusty bread followed by a pretty classic dish of sautéed mussels with white wine, cream and garlic, all with a huge chopped salad. Which pretty much knocked Dale out.

And three remained.

So, we built a fire, opened a bottle of local Pinot Noir (a glass of rum for Dad) and I got to that blackberry crumble.

In our 'kit' from Jenny-King there were about two cups of Trader Joe's Ginger, Almond and Cashew Granola cereal, about a half a cup of flour, maybe a quarter of a cup of sugar, a few dashes of powdered ginger, and I'm pretty sure that was about it. Oh, some cinnamon?

So I preheated the oven (which is all lit by propane and runs about fifty degrees hot) to about 350. Put all of the rinsed blackberries in a deep cast-iron pan with a little lemon zest, sprinkled the 'kit' over the top, sliced up a stick of butter and scattered that over the crumble along with some brown sugar and put in in the oven.


Jenny-King told us we would know it was done when all the blackberry juices bubbled up through the crumble and the top was slightly browned. And she was absolutely correct. This was about thirty or so minutes. While the crumble was cooling, Fred put a little heavy cream and some sugar in a bowl and got to whisking.

The night was cool, the windows were open, the fire was roaring, the wine glasses were full, and the classical music played on as the three of us sat by the hearth scraping clean our bowls of fresh, hot blackberry-that-we-foraged-ourselves-from-the-property crumble, topped with fresh whipped cream.

And so once again, twice in one trip, a Cosmic Muffin moment. There was no where else I could have possibly wanted to be. Talk about perfection.


And now, now I'm back in Los Angeles. And it is go time. One month to wrap things up: my life of thirteen years, my friends, my job, packing up my house, and hitting the road with Fred and our pups for the long way home. The extended drive across the country, through the cities, towns, communities, restaurants and kitchens of our country, and specifically the South, until we pull up to our new house in Richmond, Virginia.

Are you ready for us?


Jenny-King's Wild Blackberry Crumble

Serves 4-6

*This is all approximate as I was not given an actual recipe. But winging it can be fun!

4-5 cups fresh blackberries
2/3 cup all-purpose flour
1/4 cup granulated sugar
1/2 cup light brown sugar
8 tablespoons (1 stick) butter, sliced
1 teaspoon lemon zest
2 teaspoons powdered ginger
1 teaspoon cinnamon
1/2 teaspoon salt


In a large bowl combine granola, flour, brown sugar, ginger, cinnamon, and salt. 

In a large bowl combine berries, 1/2 cup sugar, lemon zest and toss to coat. Pour berry mixture into large cast-iron or casserole. Top with crumble topping and evenly distributed slices of butter.

Bake until top is golden and fruit is bubbly, about 35 minutes. Serve warm.

Top with whipped cream or ice cream.



Two years ago: LQ@SK


Minggu, 18 Agustus 2013

Delicious Peanut Buttercream Frosting with Easy Chocolate Cake


all i can say is...

if you love PEANUT BUTTER

you'll love this cake.


 this "cake"post is all about the frosting.
the cake is good and super easy to throw together, but it definitely takes a back seat to this sweet savory smooth peanut butter buttercream frosting.
my friends were absolutely head over heals about this cake.  the aroma of peanut butter wafted though the air.  they were rolling there eyes before the first bite...  i even got called into the manager's office because of this cake.  my friend Jennifer said, "ah jules...i need to see you in the office for a moment..."   i thought i might have done something wrong or misplaced something important...
nope, she called me in because of this darn cake!
peanut butter frosting is a winner
i think i will try this frosting on the "Black Magic Cake" i made a few weeks ago...now that's a chocolate cake.  that would be a heavenly match.


ONE BOWL CHOCOLATE CAKE

FOR THE CAKE...
1 cup all purpose flour
1/4 cup unsweetened cocoa powder
3/4 cup granulated sugar
1 tsp espresso powder
1 tsp baking powder
1/4 tsp baking soda
1/4 tsp slat
3 Tbsp unsalted butter, melted about half way
3 Tbsp sour cream
1/2 cup milk
1 egg, room temp.
1 tsp vanilla extract
1/4 cup mini chocolate chips

preheat the oven to 325F.  grease a 9 inch round cake pan.  line with parchment.
sift flour, cocoa powder, sugar, baking soda and salt into a large bowl.  add the butter, sour cream, milk, egg, vanilla and mini chips.  mix well with a wooden spoon or rubber spatula.  it's okay if the batter is a bit lumpy, but make sure there are no clumps of undissolved dry goods.  scrap into prepared pan.
bake for 30-35 minutes.  check after 25 minutes.  cake should be firm to the touch, skewer comes out clean and cake is just pulling away from the sides.  MINE WAS DONE IN 25 MINUTES with oven at 320F
cool on rack for a few minutes then unmold and cool completely.
i like to stick it in the fridge for a bit before cutting it in half for layering.


PEANUT BUTTER-CREAM FROSTING
aka Kathleen's Peanut Butter Icing

1 cup powdered sugar
1 cup peanut butter
5 Tbsp unsalted butter, at room temperature
3/4 tsp pure vanilla extract
1/4 tsp salt
1/3 cup heavy cream

place powdered sugar, peanut butter, butter, vanilla and salt in the bowl of an electric mixer fitted with a paddle attachment.  mix on medium-low speed until good and creamy, scraping down the sides as you work.  add the cream and beat on high speed until the mixture is light and smooth.

NOTES...i have not worked with frosting a lot, but i found this one very forgiving.  as in...it was easy to work with and did not get stiff as i was playing around.  i could go back and fix the top, practice my swirls and work on the sides.  i'm learning as i go.
also...i baked the cake on a Tuesday, frosted the cake on Wednesday and took the full cake shot.  Thursday i shot the slice and served it Thursday afternoon.  my point IS...this can be made the day before and sit covered on the kitchen counter.

Kamis, 08 Agustus 2013

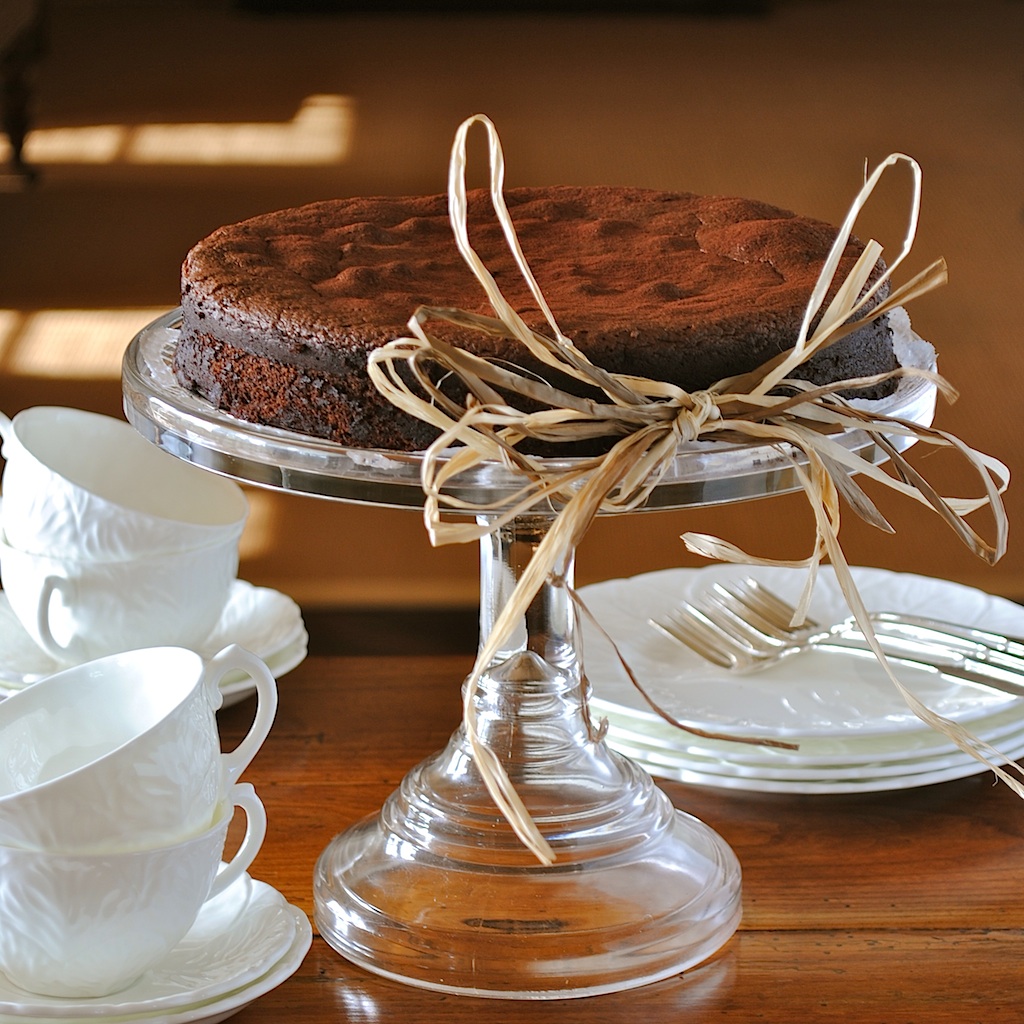
Chocolate Chipotle Almond Cake


YOU CAN'T GO WRONG WITH CHOCOLATE CAKE

flourless chocolate cake
and, of course, in my usual fashion...
espresso to deepen the flavors with
a smoky chipotle kick...even better

everyone loves chocolate cake and i seem to be obsessed at the moment so there will be quite a few coming your way.


RICH, DENSE, MOIST,

DEEP DARK CHOCOLATE

A TOUCH OF SMOKY SPICE

full fat, full sugar...INDULGE!

 GLUTEN FREE for the whole crowd to enjoy.


this cake is an easy one to make and there's no need for icing or frosting...the cake speaks for itself.   a great choice for a party.  i bet you could get at least 10-12 maybe even 14 good slices because it's a lot easier to slice and serve than the classic flourless cake.
i've made quite a few flourless cakes (a great recipe coming soon).  i love them, but i have always been disappointed with the presentation on the plate.  serving them is a mess.  chocolate all over the the knife, me, the table.  this one slices like a dream.  it's the almond meal that makes this cake very stable.  i was worried that it might make the texture a bit grainy or less "truffle-like", but it turned out smooth as silk.  i will definitely make this cake again.   
to the true chocolate aficionado, this would not be considered the "classic flourless chocolate cake" like "the Chocolate Valentino"...example shown HERE.  the aforementioned aficionado would not compare the two... 
BUT i guarantee....

THIS IS A GOOD CAKE !


CHOCOLATE CHIPOTLE ALMOND CAKE
recipe found at No Special Effects...original from River Cafe
i adapted in a few flavors and changed the temp and time.

180g (6.3z) 70% chocolate
180g (13 Tbsp) unsalted butter
200g (2 cups almond meal)
2 whole eggs, room temp.
6 egg yolks
4 egg whites
1 vanilla pod, split and scraped
200g (1 cup) caster sugar
15g (1 Tbsp) caster sugar
60g (11 Tbsp) dutch processed cocoa powder
1 tsp espresso powder
1/4 rounded tsp of ground chipotle powder...i could have used a little more
pinch of salt

preheat oven to 300F?...says all posts using River Cafe recipe...SEE MY NOTES AT BOTTOM
spray a 9" cake pan and line the bottom with parchment.  spray the parchment again.
break the chocolate into small pieces and cut the butter into cubes.  heat both in a double boiler just until melted and combined.  remove from heat and set aside to cool.

in a large bowl, beat the 2 whole eggs, 6 yolks and the 200g caster sugar until combined.  add the almond meal and the cocoa powder until combined.  scrape the vanilla seeds from the pod and add to the mixture....now add the melted chocolate mixture and stir until well combined.

in a stand mixer, beat the egg whites until frothy.  add pinch of salt and beat until soft peaks...add 15g caster sugar and beat until stiff peaks are formed.

fold egg whites into chocolate/almond mixture doing this 1/3 whites at a time.  the chocolate mixture is stiff so just do this carefully and gently while keeping volume in the mixture as well as possible.

pour the combined batter into prepared pan and bake in preheated oven for 25 minutes...???
WAIT...here are my notes...
IMPORTANT NOTE  about temperatures and time...the originals (this recipe is on a few sites) did not state convection so i used regular oven setting.....i knew in my mind there is no way a chocolate cake with 6 eggs is going to cook at 300 degrees in 25 minutes.
i found this out the hard way.
i started at 300F...at 25 minutes the cake was still batter.  i turned the oven up to 330F and baked it for an additional 22 minutes.
THAT'S 47 MINUTES TOTAL!
my cake came out perfect, so if you would like to follow what i did i would suggest doing the same and watching the cake.
OR...might i suggest using your own "baker knowledge" and again keep an eye on the cake.


Sabtu, 03 Agustus 2013

One Bowl Chocolate Cake with Chipotle Chocolate Ganache


YES...another chocolate cake.

i can't help myself.

the cake is a good cake.  it's super easy,

but the ganache is what really sends this to
the "make again" pile.

this one bowl chocolate cake comes to you from The 5 Second Rule.com.  it truly IS an easy cake to whip up.  the first time i made it for this post i might have over baked it for about 3-5 minutes.  i followed the recipe for 30-35 minutes.  the second time i baked it for 25 minutes...much better...delicious and moist.  so i suggest you be an "oven-watcher".  make sure you do not over bake...this cake can not handle it.


THE GANACHE !!!

i have found through trial and error the correct ratio of chocolate to cream.  i've checked so many different sites and blogs with so many different opinions, but i found that matching ML's to GRAMS works best.  example...175 grams chocolate to 175 milliliters heavy cream.  i like to use Guittard coverture dark chocolate discs with a couple tsp of corn syrup to create a nice smooth soft chocolate coating.

DON'T WAIST THE RUN-OFF....
TRUFFLES ARE IN ORDER.

make sure you pour glaze on cake over a clean cookie sheet or parchment to catch the run-off.  scrape this up then put in a bowl in the fridge.  you can whip up some delicious truffles to add along as a bonus treat or enjoy them after the cake is long gone.  they last in the fridge at least a week or maybe two.
just wait until it is solid.  using rubber gloves form the ganache into balls then roll in cocoa powder.  these truffles will be VERY soft at room temperature so store them in the fridge.

this is not like my normal truffle recipes, but
NO CHOCOLATE GOES TO WASTE IN THIS HOUSE
and any truffle is a good truffle.

if truffles are too fussy for you...
rewarm the ganache over double boiler before cake service and pour as sauce over individual servings.


ONE BOWL CHOCOLATE CAKE
with DARK CHOCOLATE CHIPOTLE GANACHE

FOR THE CAKE...
1 cup all purpose flour
1/4 cup unsweetened cocoa powder
3/4 cup granulated sugar
1 tsp espresso powder
1 tsp baking powder
1/4 tsp baking soda
1/4 tsp slat
3 TBsp unsalted butter, melted about half way
3 TBsp sour cream
1/2 cup milk
1 egg, room temp.
1 tsp vanilla extract
1/4 cup mini chocolate chips

preheat the oven to 325F.  grease a 9 inch round cake pan.  line with parchment.
sift flour, cocoa powder, sugar, baking soda and salt into a large bowl.  add the butter, sour cream, milk, egg, vanilla and mini chips.  mix well with a wooden spoon or rubber spatula.  it's okay if the batter is a bit lumpy, but make sure there are no clumps of undissolved dry goods.  scrap into prepared pan.
bake for 30-35 minutes.  check after 25 minutes.  cake should be firm to the touch, skewer comes out clean and cake is just pulling away from the sides.  MINE WAS DONE IN 25 MINUTES with oven at 320F
cool on rack for a few minutes then unmold and cool completely.

above photo you can see a little condensation from being in the fridge.  this will disappear when bringing the cake to room temp to serve.

FOR THE GANACHE GLAZE...

200 grams good dark chocolate.  i use Guittard 61% coverture discs
200 ml heavy cream
2 tsp light corn syrup corn syrup
OPTIONAL...1 large chipotle in adobo sauce, slightly chopped

#1...have your cake ready for the glazing.  cake should be on a 9 inch cake board for easy lifting.  place cake over wire rack and have something under that to catch the over-flow of ganache.

chop chocolate into small pieces.  put in a glass or heat proof bowl.  set aside.
heat cream, chipotle(if using) and syrup in a small sauce pan to just boiling.
NOTE...if using chipotle you must strain the cream mixture before adding it into the chocolate pieces.
pour hot cream over chocolate and let sit for a minute.  start to gently stir from the middle.  take your time.  you will see the ganache come together.  when it is fully incorporated, smooth and glossy, you are ready to pour.
start pouring onto the middle.  you might want to "over pour"...as in pour a lot on.  you might find it necessary to carefully pick up the cake and gently wiggle the ganache to get it to flow evenly over the cake.  DO NOT go back with a knife or spreader to fix any imperfections.  this might take a little practice, but it is quite easy and makes a stunning presentation.  you can always cover any tiny flaws with some shaved chocolate...or chalk it up to the cake with "character".
NOTE...you can refrigerate the finished cake to set the ganache, but must take out ahead of time so the glaze does not have condensation(as shown in photo).
the second time i made the cake the day before and glazed the cake hours before serving.  i put the cake in the fridge for about 20-25 minutes to just help set the ganache then left the cake out for service in a few hours.
if you do not have a cake cover small enough for the fridge...i like to use an over-sized spring form pan to protect the cake from prying hands and fingers while refrigerating or for traveling.  make sure you secure the bottom if traveling so it won't slide.